Because sometimes we all need a little help.
Home / Webolia Setup – Step 4
1- Go to this file and download the xml file.
2- Go to Contact > Contact Forms on WordPress.
 
													3- Delete all contact forms.
4- Go to Tools > Import, scroll down to WordPress and click Install Now.
5- Run Importer.
 
													6- Choose the xml file you downloaded and “Upload file and import”.
7- Select admin as import author and click on Submit.
8- Go to Contact, open the contact form and change the highlighted parts if necessary
<div class=”row”>
<div class=”col-md-6 mb5″>[text* first-name class:form-control class:input-md placeholder “Name & Surname“]</div>
<div class=”col-md-12 mb5″>[tel* tel class:form-control class:input-md placeholder “Telefon”]</div>
<div class=”col-md-12 mb5″>[email* email class:form-control class:input-md placeholder “E-Mail”]</div>
<div class=”col-md-12 mb5″>[textarea* message x7 class:form-control class:textarea-md placeholder “Describe your project…“]</div>
<div class=”col-md-12″>[submit class:btn class:btn-md class:btn-custom1 “SKICKA”]</div>
</div>
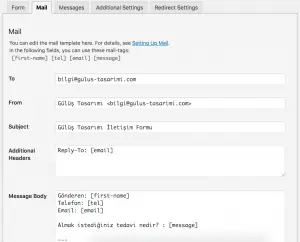
9- Change the TO and FROM sections of the Mail according to your site.
10- Change Subject to Site Name Contact Form via <site-name>.
11- Add Reply-To: [email] in Additional Headers section.
12- Change the highlighted parts according to your site
Contact: [first-name]
Phone Number: [tel]
Email: [email]
Describe your project…: [message]
—
Kundförfrågan från hemsida Stockholmbyggfirma – www.stockholmbyggfirma.com
13- Once you are done, you should have a mail setting similar to the image below.
 
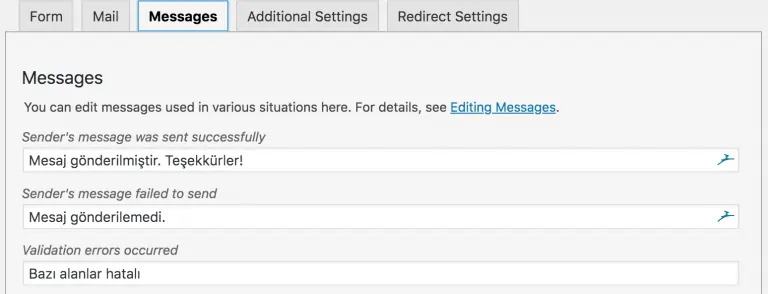
													14- Click on the Messages tab and make sure that the messages are in Turkish/Swedish as in the image below. If not, go to an approved site and copy/paste the messages.
 
													15- Make sure to Save the changes before leaving the form.