How can we help?
Zapier – Content Automation
Connecting Wordapp to Google Sheets
Wordapp is a free word-processing app for eCommerce that specializes in content automation. It offers you all of the functionality and features needed to create SEO and SEM optimized content in a simple, fast and cheap workflow! With its system of SEO conforming content templates and SEO keyword rules, Wordapp is one of the best performing SEO tools on the market.
Perhaps you have already been using Wordapp to create your site’s content much more quickly and simply than ever, but you are still wondering how to get even more content automation out of Wordapp? A great way to do this is to connect Wordapp’s output directly to Google Sheets so that all the published content will update live in a Google Sheets document. This can be achieved by using Zapier to connect your Wordapp output to a Google Sheet, and then manage all content en masse using all the power of the spreadsheet tool. Read on to learn how to use Zapier with Wordapp.
Goal: Wordapp Self Service – Connect a Wordapp project’s output to your Google Docs spreadsheet using a Zapier “Zap” to achieve content automation.
For this Tutorial on setting up content automation, you will need to be a Publisher or Manager on an active project in Wordapp and have an account with Zapier.com.
1. Sign in to Wordapp
Start by signing into Wordapp, and navigating to your the Task Feed. Find the publishing tasks that you want to publish via the Zapier app. Note that on those tasks, you must be assigned as a Publisher in that tasks project.
2. Creating a Trigger in Zapier
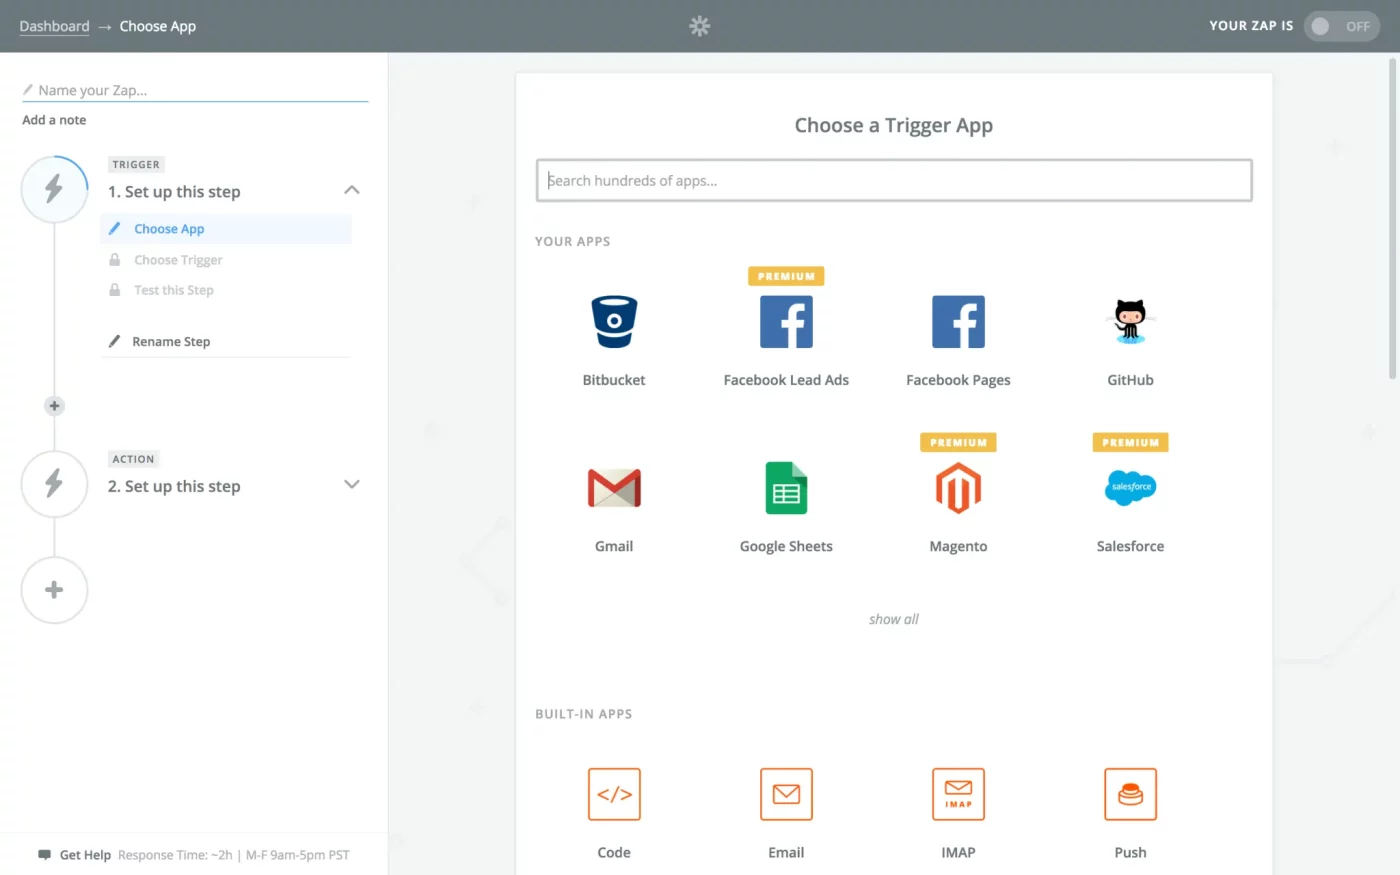
Then go to Zapier.com, sign up for an account, or sign into your existing account. In the Zapier dashboard click, “Make a Zap.” Zapier works by allowing you to create triggers that active events in other apps. You will need to create a trigger for Wordapp. But first, you need to choose Wordapp as the trigger app. Start by clicking “Choose An App,” and in the “Choose A Trigger App” section on the right, when you type Wordapp, the Wordapp icon will appear. Select the Wordapp trigger app, then you need to choose which Wordapp function will activate the trigger. Click “Choose a Trigger.” In the section on the right, “New Content Order Approved” will automatically be selected. Now, this event triggers when a content order is approved by the publisher. Click continue to proceed to the next step.
Now you should be at the choose account section, where you have to make sure Zapier has the proper credentials to access your Wordapp account. If you are not already there, next click “Choose Account” on the left side. On the section on the right “Select Wordapp” Account click the “Connect a new Account button.” If you there are existing accounts, you may need to scroll down to find the button.
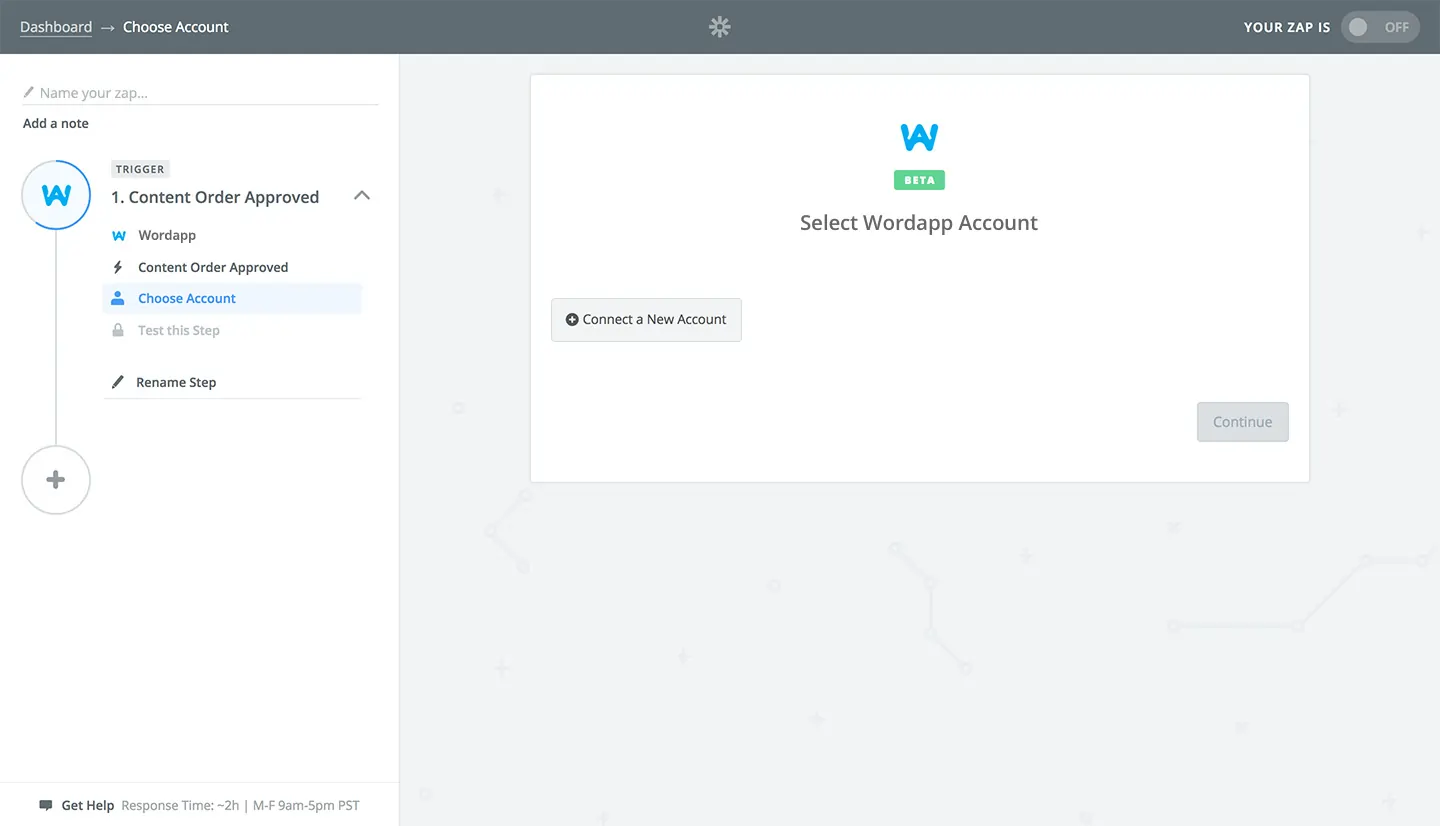
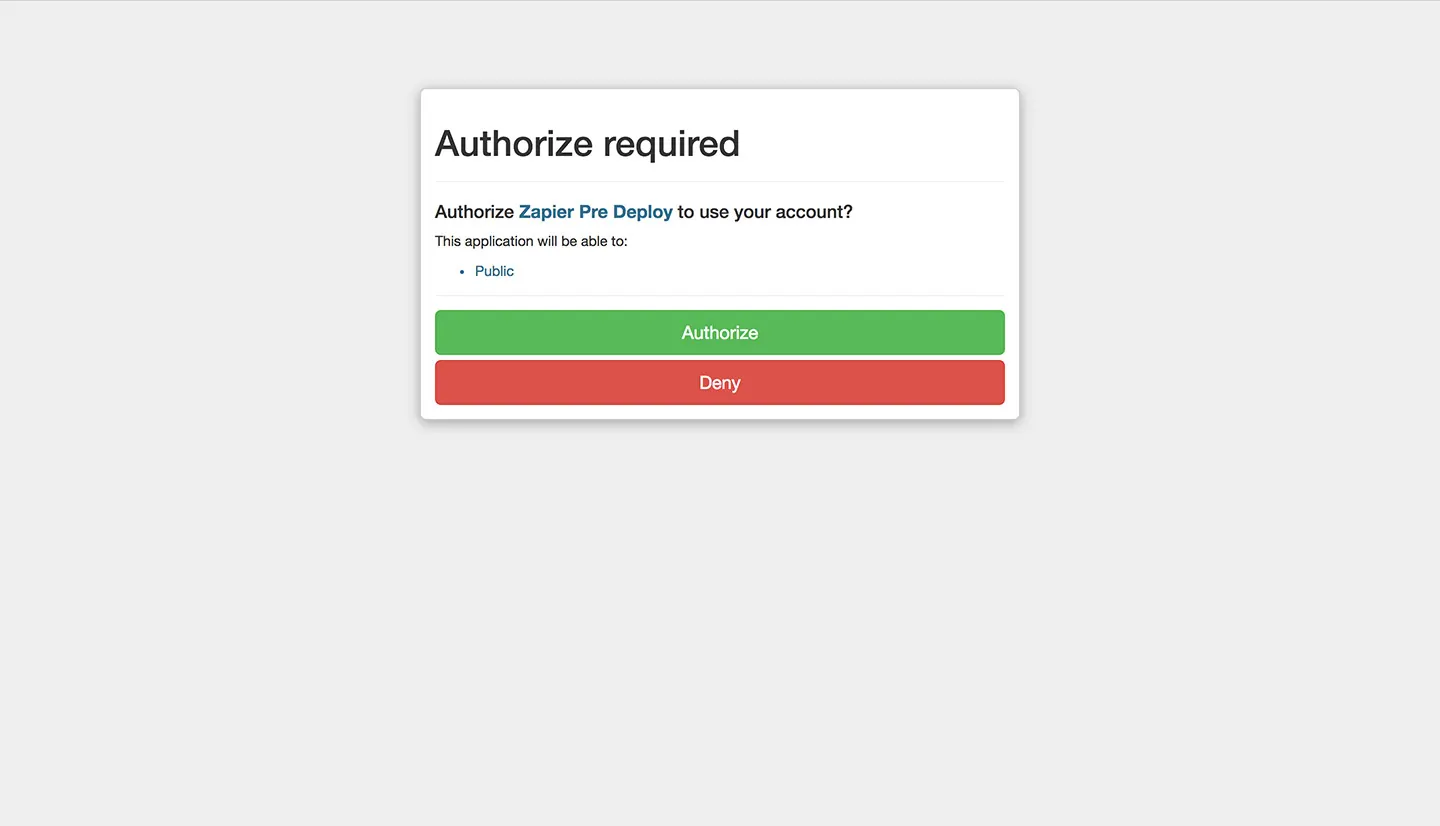
An authorization window will pop up. Choose to “Authorize” Zapier to use your Wordapp account.
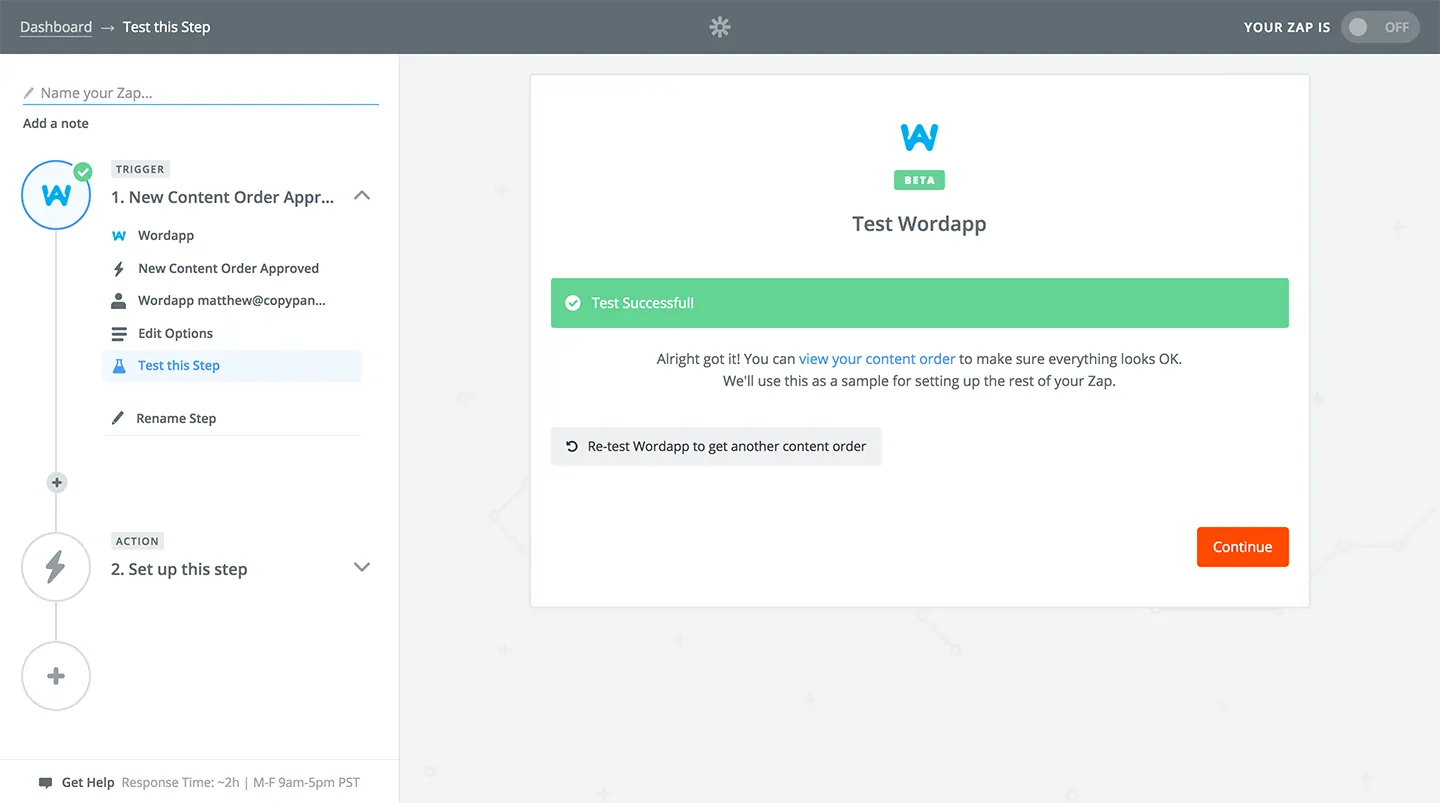
At the right of your newly created account, click the “Test” button. It should turn green and say “Success!” Still no content automation yet, but we’re getting closer! Now it’s time to click “Save and Continue.”
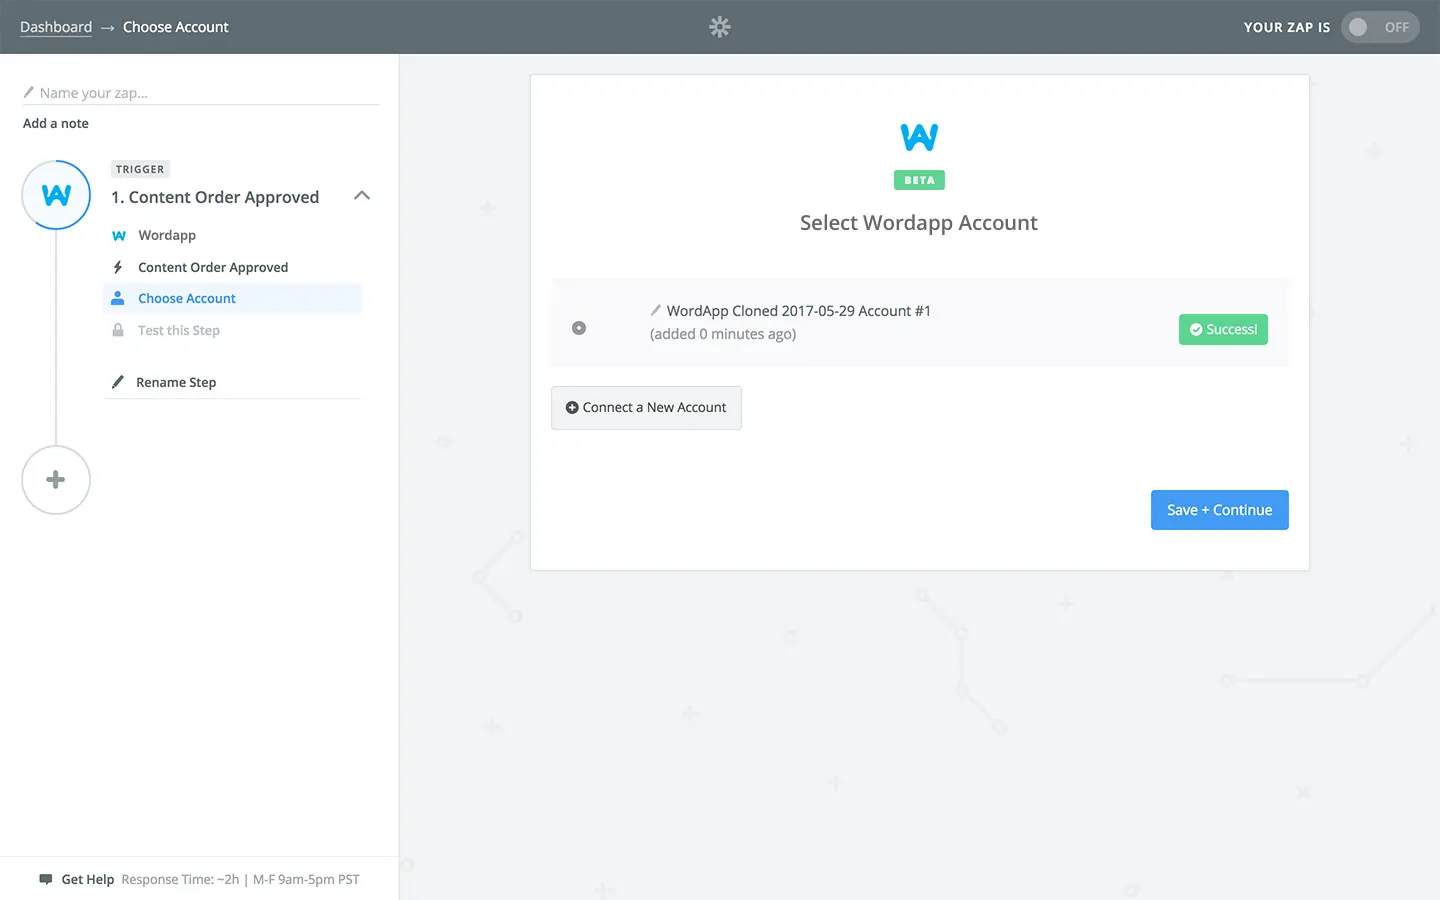
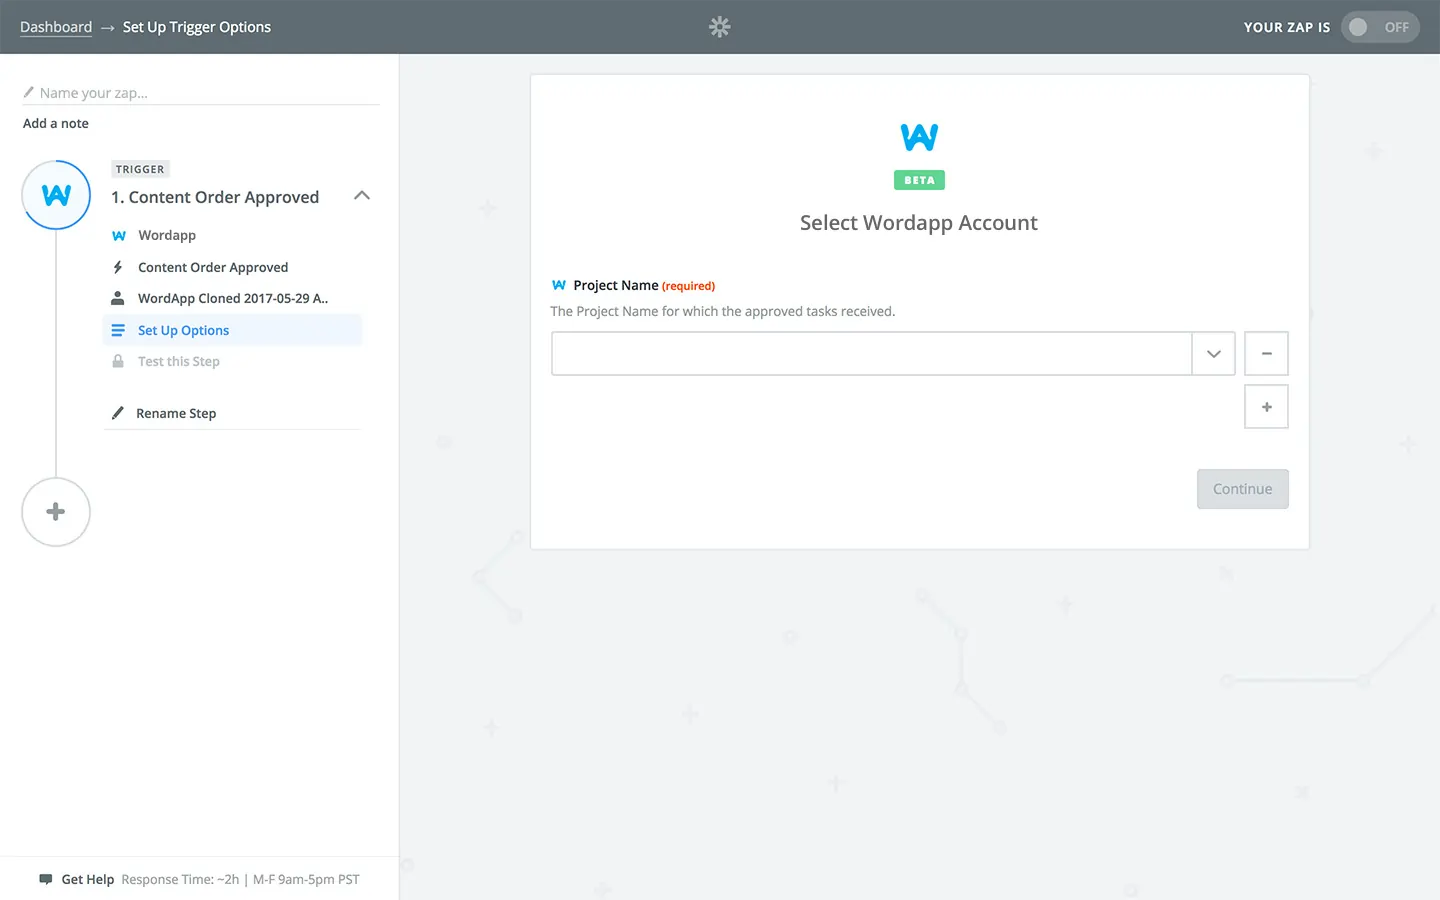
Now that your Wordapp account is connected, you will be able to choose the Wordapp project to which you want to connect your Zap. Next, you will want to select the project that you already created in Wordapp. You should see your project listed in the drop-down menu that opens. Select it, and when you are done click “Continue.”
Test the connection to your project by clicking “Fetch and Continue.”
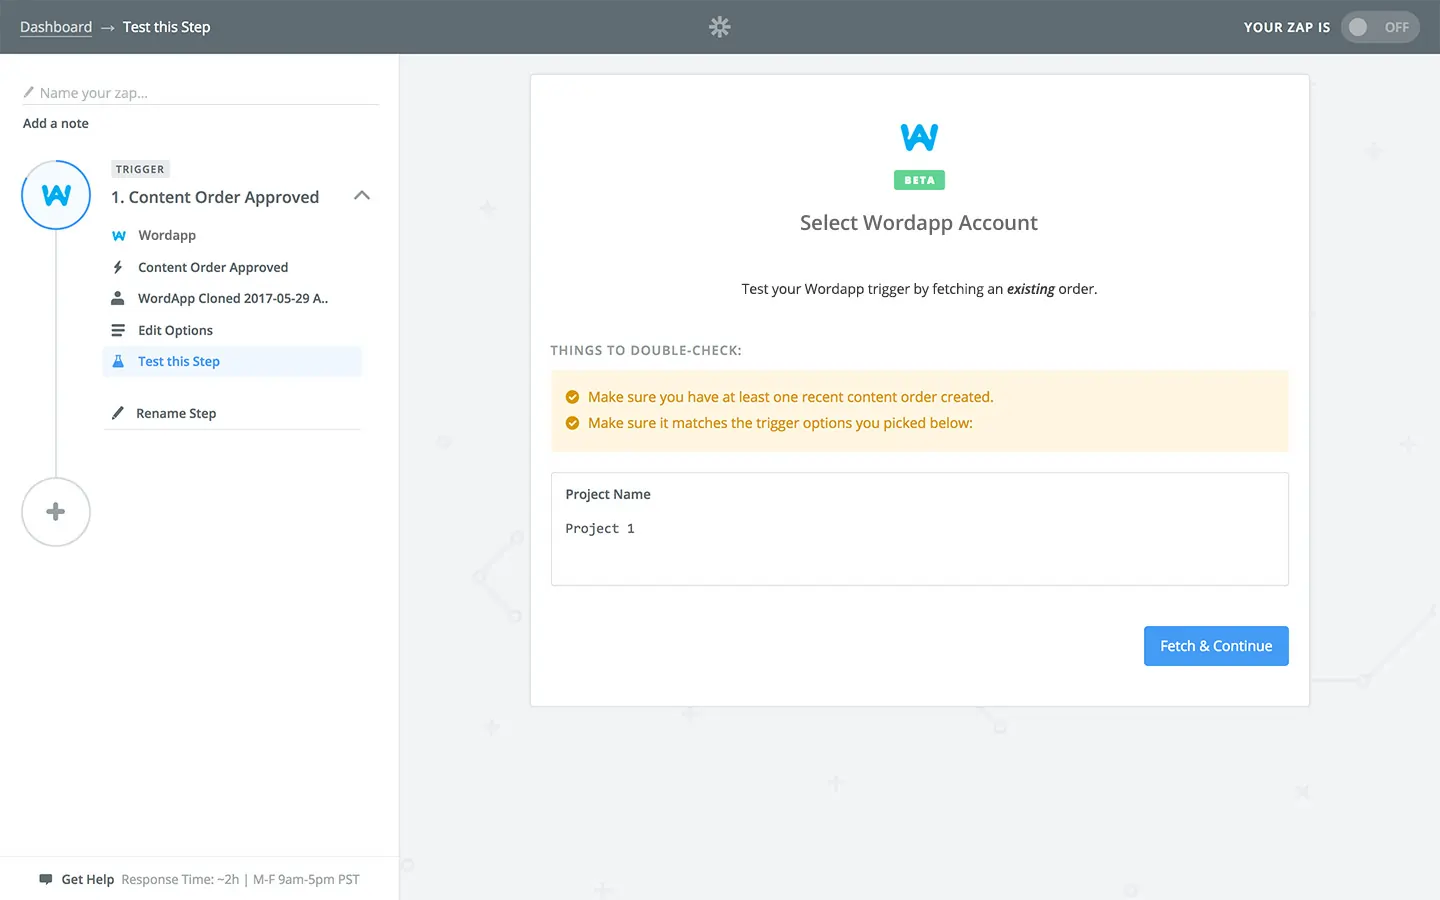
At this point, you should see that your test was successful. If all is well, click “Continue,” you’re ready to configure Google Sheets as the Action App.
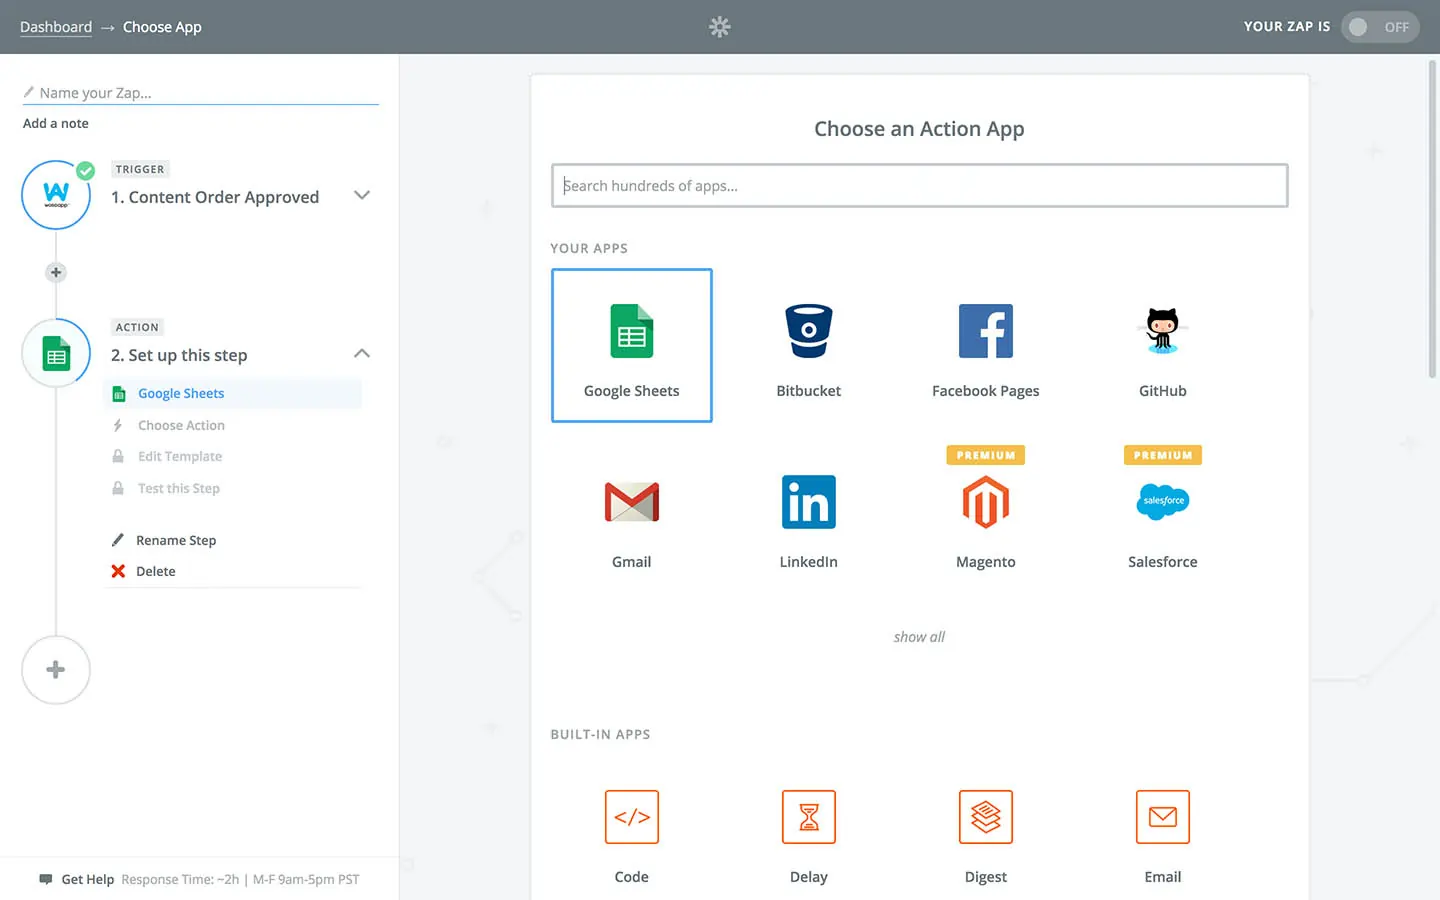
3. Choosing an Action
In Zapier’s Action section, Choose an Action App sections, choose Google Sheets. Now choose an action. In this case, choose “Create Spreadsheet row.” Click the “Save & Continue” button. Next, Add Your Account by clicking “Connect a New Account.” You will be prompted to add your Google account info. Click “Allow.” Be sure to name the account something unique, it’s convenient housekeeping. Click “Save & Continue.”
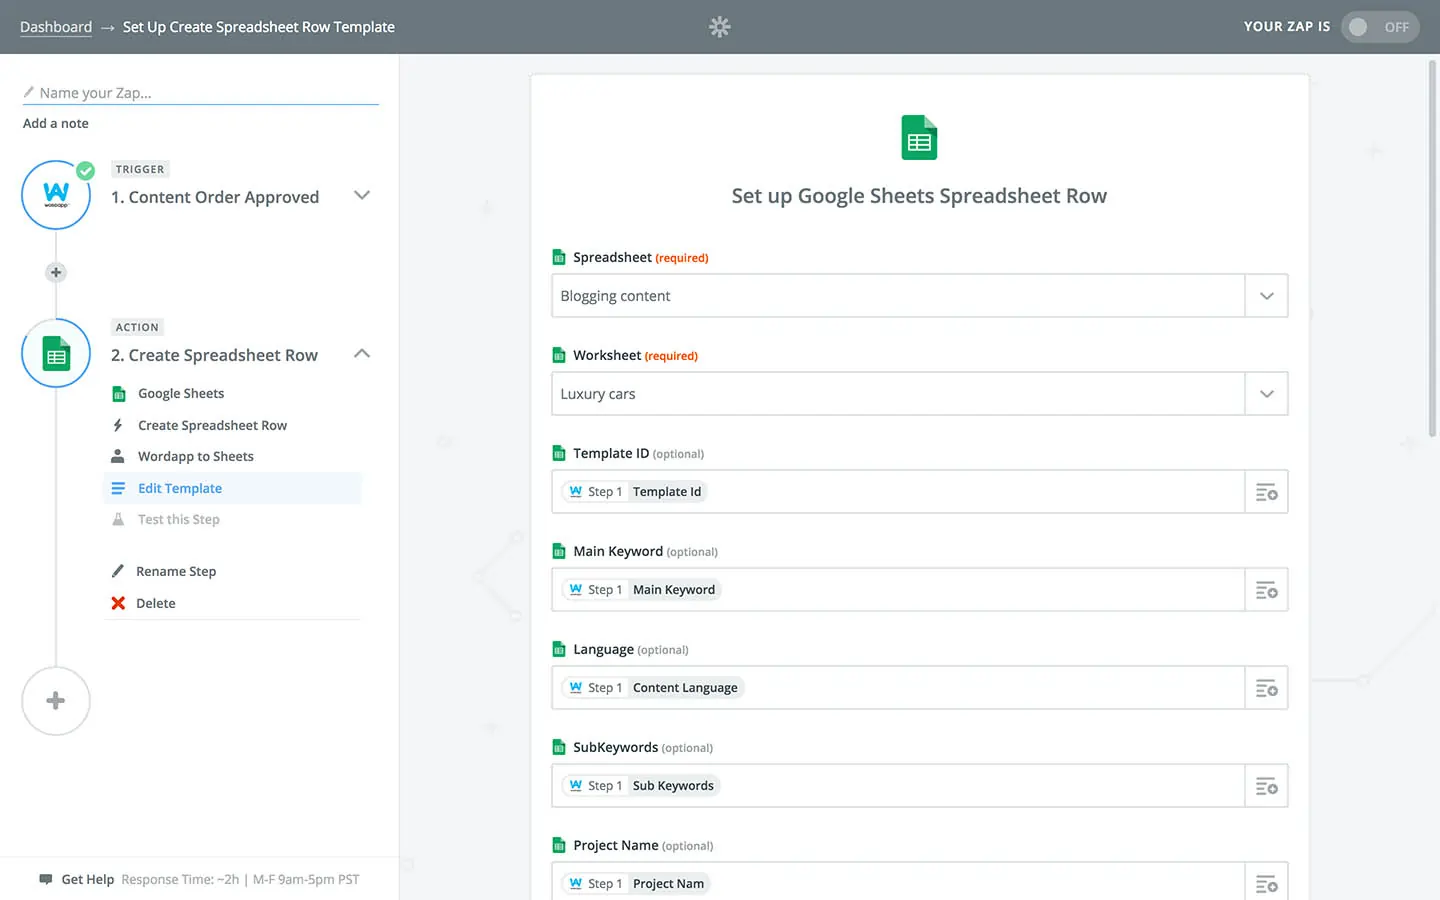
4. Hooking up the Template
Now you are ready to set up the template. On the section to the right “Set up Google Sheets Spreadsheet Row,” first choose your spreadsheet to which you want your content sent. Then choose the worksheet within that spreadsheet. After you select your worksheet, the section is updated with a header from your actual Google Sheet. Content automation, here we come! For each template’s search field you will select a corresponding entry from the template you chose for your Wordapp Project’s Content Order.
The best approach for this is to remember that in there should be a one-to-one relationship between your content order’s template and the column that you set up in your Google Sheet. So when you set up your Google Sheets’ columns, set them up so that the columns’ content corresponds to the content of each item your Wordapp Content order’s template. If you can do this, then in each search field in Zapier you select below, you will easily see the corresponding Wordapp template item in each of the dropdowns. You are now a long way down the road to content automation. When you are done with this, click continue.
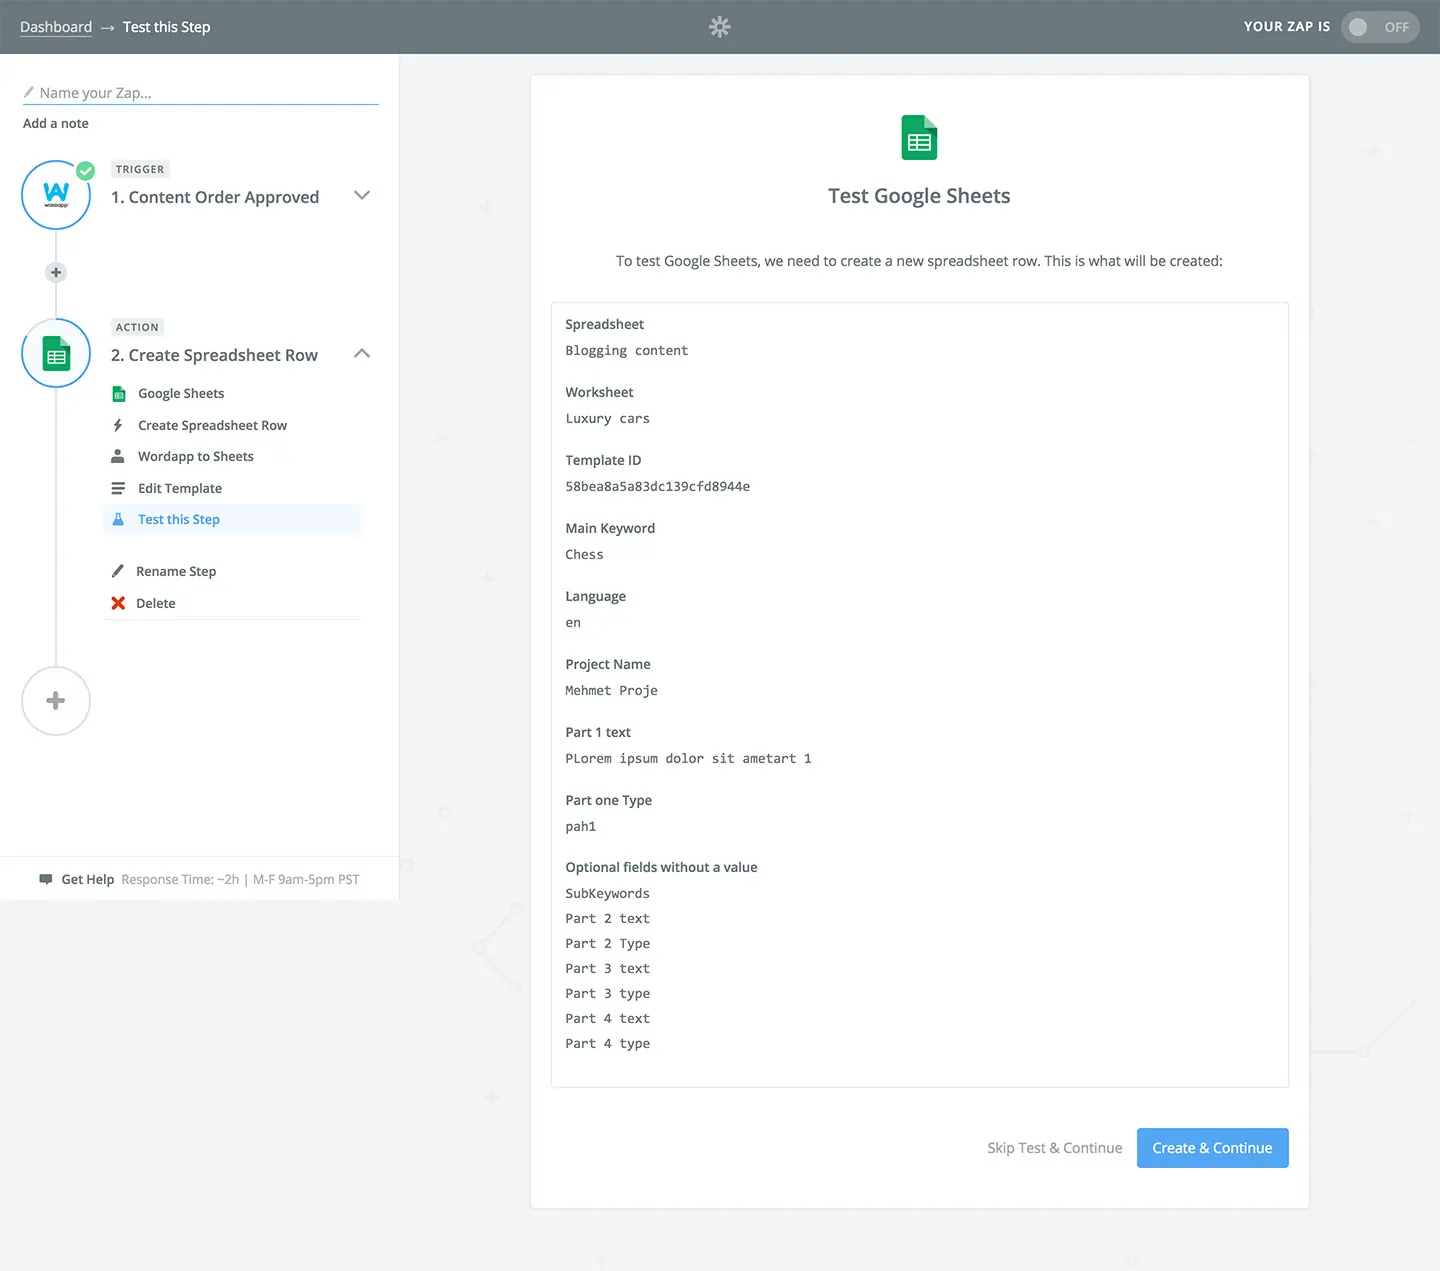
5. Testing the Zap to Confirm Content Automation Will Work
If you did everything correctly, the template should be laid out as you intended. Now you can click the “Create and Continue” button to test and continue. At this point, you can go to your Google Sheet, and if the test worked correctly you will see Lorem Ipsum test data sent by the Zap that matches your header has been added. That means it worked, and you can safely delete this test data.
Click the “Finish” button. And on the following screen, you can turn on the Zap when you are ready. Now you have successfully setup content automation, and any content that is published in the connected Wordapp project, will be sent to this Google sheet.
6. Publish your text
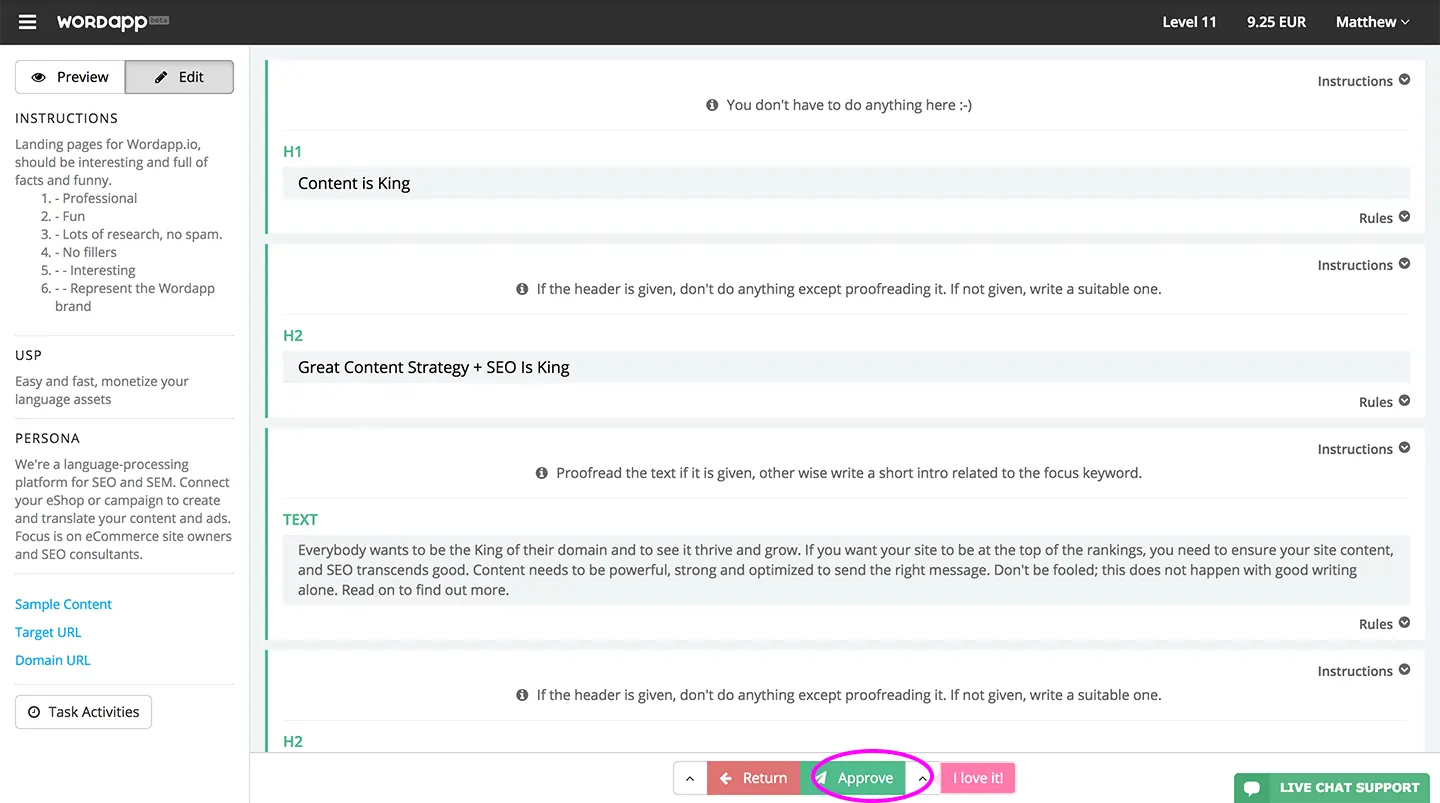
So let’s try this for real on a running project. Go back to Wordapp, and in the project that is connected to Zapier, open one of the tasks you plan to publish. Review the text is up to your standards, and then click the “Approve” or the “I Love It!” button at the bottom of the screen.
That’s it! Now, when you go back to your Google Sheets document you should see that the text from the approved task is in your Google Sheets document.
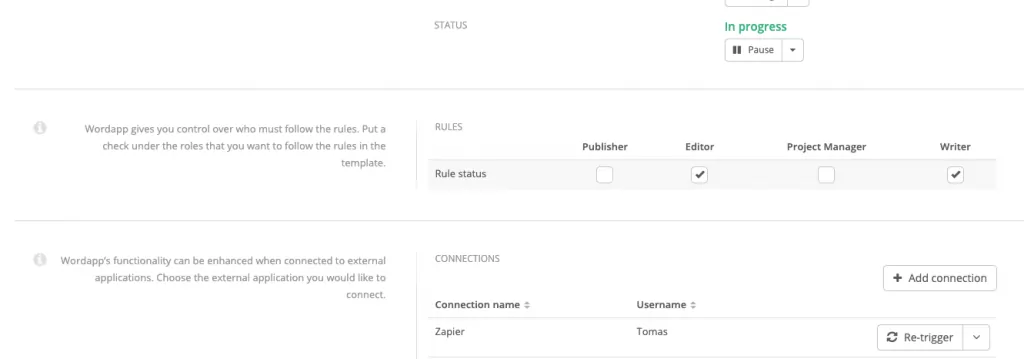
7. Retriggering already published texts [optional]
If you already have texts that are published, you can ‘retrigger’ them to run the zap from scratch. Please note it will run all the approved/published texts in the project so it might take a while.
Open the content project in Wordapp and head over to the “General Information” tab. At the bottom you will see ‘connections’. Click ‘retrigger’ to run the zap for all your approved/published texts.