3- If you are using a different template ( takarbete or another one ). You need to copy settings from an approved site.
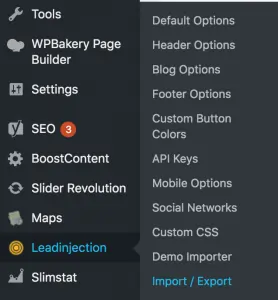
In your approved site, login to WordPress Dashboard > Lead Injection > Import / Export.
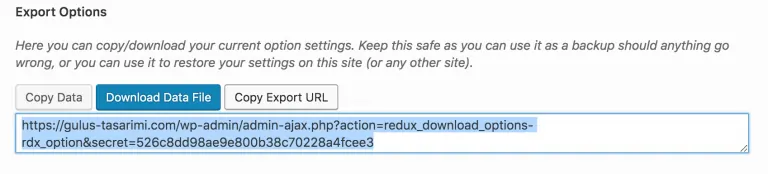
Click on Copy Export URL under Export Options.
Paste the URL in LeadInjection Import from URL section described in Step 2.
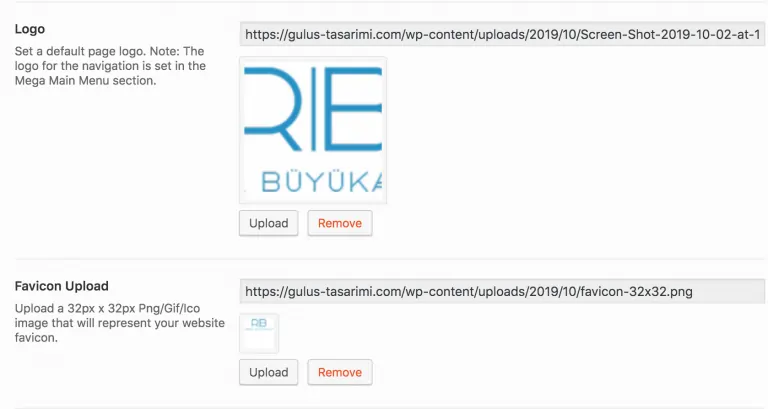
4- Click Default Options on the same page and scroll down to Logo section.
5- Download the company logo from the Google Drive folder (link provided in the Certificates/Images cell of the Production Sheet ) or from client’s website. Make sure to select a vectoral logo image with transparent background.
6- Change the size of the downloaded logo so that the height is around 40-50 pixels (you can experiment on this if the logo looks too small or too big on the site).
7- Upload the logo to WordPress, change the Title and Alt Text of the image to: Focus Keyword + Logo (ie. Byggfirma Stockholm Logo).
8- On the same page upload a favicon image. Download the company logo and create a good looking favicon image. Pay attention to the favicon image requirements (32px x 32px, png/gif/ico).
9- Set the Title and Alt Text of the image as Focus Keyword + Favicon (ie. Byggfirma Stockholm Favicon).
10- Save changes.
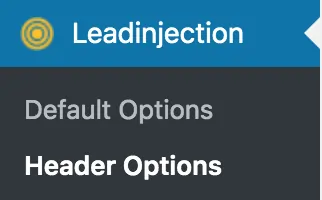
11- Click on Header Options and scroll down to Top Bar Phone Number.
12- Go to the Production Sheet and copy the Tracking Phone Number for the domain.
13- Paste it to the Top Bar Phone Number area in XX – XXX XX XX format (ie. 08 – 123 45 67 or 010 – 123 45 678).
14- Change the Top Bar Email to the email in the Production Sheet (it’s usually either offert@domain.com or kontakt@domain.com).
15- Save changes.
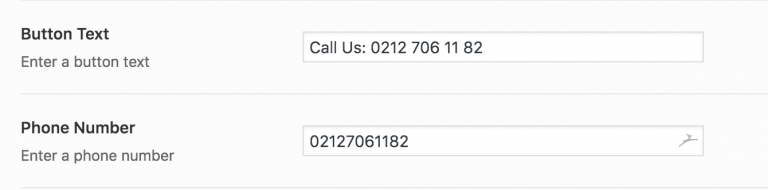
16- Go to Mobile Options and change both the Button Text and Phone Number. The formats should be the same as below.
17- Save changes.
18- Go to Social Networks and copy/paste client’s social media accounts available in the Production Sheet.
19- Save changes.
20- Go to Settings > General, set the site title and Tagline as your CTA (you can find your CTA in the Production Sheet CTA (offer) column).